Part 2: Getting Started with Autoscaling on AWS using Cloudformation - Load Balancing

In part 1 we looked at working with autoscaling groups on AWS. Now let’s dig into load balancers and at the end, connect everything together.
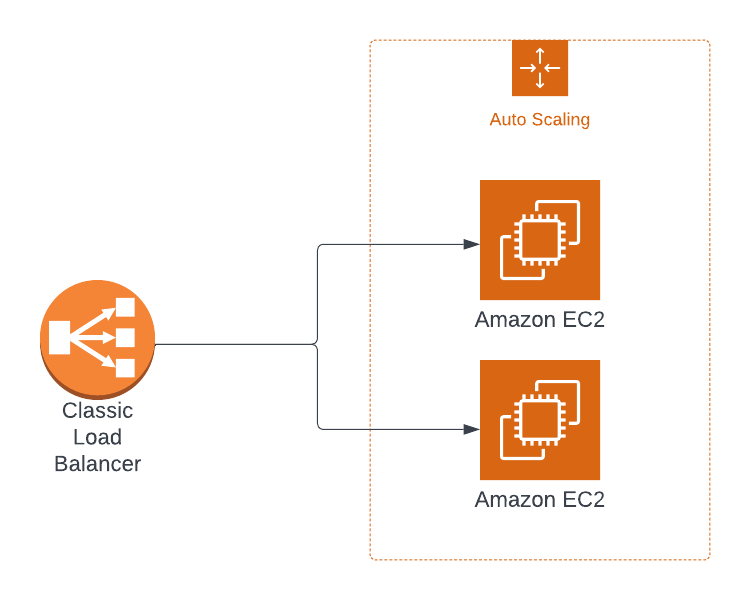
An Elastic Load Balancer distributes requests to your application spread out over multiple EC2 instances — or ECS containers, etc. These targets are grouped into what is appropriately called a "target group". The load balancer monitors the health of the targets and automatically stops routing traffic to unhealthy instances.
It's also completely managed by AWS so you don't have to manage the scaling of the load balancer itself at all. And if you want it integrates with the AWS Certificate Manager (ACM) allowing you to do SSL termination directly at the load balancer.
There are 4 different types of load balancers:
Network load balancer
Application load balancer
Gateway load balancer
Classic load balancer
In this article we will only be focusing on the application load balancer (ALB). ALB is what you’re used to if you’ve ever configured for instance an Nginx loadbalancer. The classic load balancer is a deprecated legacy option while network and gateway load balancers are for more niche use cases.
ALBs are so-called layer 7 load balancers, meaning they use HTTP. This allows us to create so-called listener rules and route traffic based on the requests coming in. For instance we can route all requests with a specific header to one target group or requests going to `example.com/store` to one target group while routing `example.com/blog` to another group.
With the theory out of the way, in this article we will go through the following
Create two EC2 instances with security group
Create an ALB with security group
Create a target group and ELB listener
Restrict HTTP traffic to the EC2 instances from the ALB
Synchronize an autoscaling group with the target group
Prerequisites
Before getting started, you will need the following prerequisites:
Create two EC2 instances with security group
As a first step we’ll create two EC2 instances to setup our load balancer against. But before we do that, let’s create the security group in a file called cfn.yml.
# cfn.yml
Parameters:
  MyVpc:
    Description: A VPC available in your account
    Type: AWS::EC2::VPC::Id
    Default: "<your default VPC ID>"
Resources:
    InstanceSecurityGroup:
      Type: 'AWS::EC2::SecurityGroup'
      Properties:
        GroupDescription: Enable SSH access via port 22 and http port 80
        VpcId: !Ref MyVpc
        SecurityGroupIngress:
          - IpProtocol: tcp
            FromPort: 22
            ToPort: 22
            CidrIp: 0.0.0.0/0
          - IpProtocol: tcp
            FromPort: 80
            ToPort: 80
            CidrIp: 0.0.0.0/0
We’re passing in the vpc id as a parameter and referencing it in the security group. The security group itself is very simple, allowing ingress traffic on port 22 for SSH and port 80 for HTTP.
In order to find your vpc id you can either search for “VPC” in the console or use the command
aws ec2 describe-vpcsSee the part 1 of this series for further details.
Before we add our EC2 instances, we will also be needing two public subnets to launch the instances into. Let’s create parameters for that as well
# cfn.yml
Parameters:
  ...
  PublicSubnetA:
    Description: One of the public subnets
    Type: AWS::EC2::Subnet::Id
    Default: "<your first public subnet id>"
  PublicSubnetB:
    Description: Another public subnet
    Type: AWS::EC2::Subnet::Id
    Default: "<your other public subnet id>"
Here you can use the
aws ec2 describe-subnetscommand to get the subnet ids. Reference part 1 for more thorough examples.
Now finally we are ready to create our EC2 instances
# cfn.yml
Resources:
  ...
  Ec2InstanceA:
    Type: AWS::EC2::Instance
    Properties:
      SecurityGroupIds:
        - !Ref InstanceSecurityGroup
      KeyName: myKeyPair
      ImageId: ami-0a261c0e5f51090b1
      InstanceType: t2.micro
      SubnetId: !Ref PublicSubnetA
      UserData:
        Fn::Base64: !Sub |
          #!/bin/sh
          kill -9 $(cat /var/run/yum.pid)
          yum update -y
          yum install -y httpd
          systemctl start httpd
          systemctl enable httpd
          echo "<h1>Hello World from $(hostname -f)</h1>" > /var/www/html/index.html
      Tags:
        - Key: Name
          Value: Ec2InstanceA
  Ec2InstanceB:
    Type: AWS::EC2::Instance
    Properties:
      SecurityGroupIds:
        - !Ref InstanceSecurityGroup
      KeyName: myKeyPair
      ImageId: ami-0a261c0e5f51090b1
      InstanceType: t2.micro
      SubnetId: !Ref PublicSubnetB
      UserData:
        Fn::Base64: !Sub |
          #!/bin/sh
          kill -9 $(cat /var/run/yum.pid)
          yum update -y
          yum install -y httpd
          systemctl start httpd
          systemctl enable httpd
          echo "<h1>Hello World from $(hostname -f)</h1>" > /var/www/html/index.html
      Tags:
        - Key: Name
          Value: Ec2InstanceB
Let’s try it out. Add the public IPs to the Cloudformation output
Outputs:
  PublicIpA:
    Value: !GetAtt [ Ec2InstanceA, PublicIp ]
    Description: 'Server A public IP'
  PublicIpB:
    Value: !GetAtt [ Ec2InstanceB, PublicIp ]
    Description: 'Server B public IP'
And create the stack as well as the keypair the stack requires
aws ec2 create-key-pair --key-name myKeyPair
# create myKeyPair.pem from output and chmod 0400 myKeyPair.pem

aws cloudformation create-stack --stack-name lb-getting-started \
    --template-body file://cfn.yml \
    --parameters \
        ParameterKey=MyVpc,ParameterValue=$VPC_ID \
        ParameterKey=PublicSubnetA,ParameterValue=$SUBNET_A \
        ParameterKey=PublicSubnetB,ParameterValue=$SUBNET_B
Wait for the stack to finish creating
aws cloudformation wait create-update-complete \
    --stack-name lb-getting-started
Retrieve the public IPs from the stack output
aws cloudformation describe-stacks --stack-name lb-getting-started \
    --query "Stacks[0].Outputs"
And verify you get a response over HTTP, either using the browser or for instance the curl command.
Note that this might take a minute or two even after the stack has been created since the userdata script has to finish running. You know this is the case because you get a response “Failed to connect to <public ip> port 80: Connection refused” error.
Create an ALB with security group
Now we’re ready to get started with the load balancer. Let’s create the necessary security group first of all
# cfn.yml
ELBSecurityGroup:
  Type: 'AWS::EC2::SecurityGroup'
  Properties:
    GroupDescription: Enable http port 80 and 443
    VpcId: !Ref MyVpc
    SecurityGroupIngress:
      - IpProtocol: tcp
        FromPort: 80
        ToPort: 80
        CidrIp: 0.0.0.0/0
      - IpProtocol: tcp
        FromPort: 443
        ToPort: 443
        CidrIp: 0.0.0.0/0
Here we of course don’t open port 22 since there is no SSHing onto the ALB (remember: it is fully managed), and we’ve added port 443 for HTTPS traffic (even though that is out of scope for this article).
Now the load balancer itself is super simple to setup.
# cfn.yml
ElasticLoadBalancer:
  Type: 'AWS::ElasticLoadBalancingV2::LoadBalancer'
  Properties:
    Type: application
    Subnets:
      - !Ref PublicSubnetA
      - !Ref PublicSubnetB
    SecurityGroups:
      - !Ref ELBSecurityGroup
Just say in which subnets you want to launch the load balancer, which security group to use and what type of load balancer you want to create.
If you want to explore more options you can check out the documentation here. Notable is the “LoadBalancerAttributes” where you can for instance activate access logs or deactivate cross zone load balancing.
We add the DNS name to the Cloudformation output
# cfn.yml
Outputs:
  ...
  ELBDnsName:
    Value: !GetAtt [ ElasticLoadBalancer, DNSName ]
    Description: 'ELB DNS name'
And update the stack, wait for it to finish updating and get the DNS name from the stack output just like above
aws cloudformation update-stack --stack-name lb-getting-started \
    --template-body file://cfn.yml \
    --parameters \
        ParameterKey=MyVpc,ParameterValue=$VPC_ID \
        ParameterKey=PublicSubnetA,ParameterValue=$SUBNET_A \
        ParameterKey=PublicSubnetB,ParameterValue=$SUBNET_B

aws cloudformation wait stack-update-complete \
    --stack-name lb-getting-started

aws cloudformation describe-stacks --stack-name lb-getting-started \
    | jq '.Stacks[0].Outputs'
But when we try and curl the DNS endpoint we get a connection refused error.
curl: (7) Failed to connect to lb-ge-Elast-20XV0YL0BQND-691257412.eu-central-1.elb.amazonaws.com port 80: Connection refusedThis is because we haven’t set up the target group and listener rules yet. Let’s do that next.
Create a target group and ELB listener
Even though we already have the two EC2 instances running, we need a way to reference them from our load balancer. The way to do this is using so-called target groups.
Target groups can have various types of targets targets, for instance EC2, but also ECS or Lambda. You can also skip the targets and let an Autoscaling Group synchronize the targets itself (we’ll see that at the end of the article). For now, let’s just reference the two EC2 instances we have.
ELBTargetGroup:
  Type: 'AWS::ElasticLoadBalancingV2::TargetGroup'
  Properties:
    HealthCheckIntervalSeconds: 6
    HealthCheckTimeoutSeconds: 5
    HealthyThresholdCount: 2
    Port: 80
    Protocol: HTTP
    UnhealthyThresholdCount: 2
    VpcId: !Ref MyVpc
    TargetType: instance
    Targets:
      - Id: !Ref Ec2InstanceA
        Port: 80
      - Id: !Ref Ec2InstanceB
        Port: 80
In addition to referencing the two EC2 instances, we also configure health checks. This allows our load balancer to check the health of our instances and remove unhealthy instances so that they don’t receive traffic anymore.
But notice that there is no reference to the load balancer in the target group. For that we need a loadbalancer listener.
ELBListener:
  Type: 'AWS::ElasticLoadBalancingV2::Listener'
  Properties:
    DefaultActions:
      - Type: forward
        TargetGroupArn: !Ref ELBTargetGroup
    LoadBalancerArn: !Ref ElasticLoadBalancer
    Port: '80'
    Protocol: HTTP
The listener contains a default action of forwarding everything to our target group above and this is already enough for our use case.
If you want to configure forwarding to multiple target groups you require adding listener rules to your listener. In addition to the default action, you can then redirect traffic based on query parameters, headers or url path. See the Cloudformation documentation for examples.
When we now update our stack we see that everything is working.
curl lb-ge-Elast-20XV0YL0BQND-691257412.eu-central-1.elb.amazonaws.com
<h1>Hello World from ip-172-31-35-93.eu-central-1.compute.internal</h1>

curl lb-ge-Elast-20XV0YL0BQND-691257412.eu-central-1.elb.amazonaws.com
<h1>Hello World from ip-172-31-4-139.eu-central-1.compute.internal</h1>
Restrict HTTP traffic to the EC2 instances from the ALB
We are now able to call our instances both using the load balancer and using the public IPs directly. This is usually not desired, we want to make sure all traffic is coming over the load balancer. Luckily this just requires a small change to the EC2 security group
# cfn.yml
  InstanceSecurityGroup:
    ...
      - IpProtocol: tcp
        FromPort: 80
        ToPort: 80
        SourceSecurityGroupId: !GetAtt ELBSecurityGroup.GroupId
      ...
Synchronize an autoscaling group with the target group
Now onto the last step, synchronizing the autoscaling group with the target group. Luckily this is also really easy now. Simply remove the two instances from our target group and export the target group ARN from our stack.
# cfn.yml
ELBTargetGroup:
  Type: 'AWS::ElasticLoadBalancingV2::TargetGroup'
  Properties:
    HealthCheckIntervalSeconds: 6
    HealthCheckTimeoutSeconds: 5
    HealthyThresholdCount: 2
    Port: 80
    Protocol: HTTP
    UnhealthyThresholdCount: 2
    VpcId: !Ref MyVpc
    TargetType: instance
    Targets:                  <-- REMOVE
      - Id: !Ref Ec2InstanceA <-- REMOVE
        Port: 80              <-- REMOVE
      - Id: !Ref Ec2InstanceB <-- REMOVE
        Port: 80              <-- REMOVE
...
Outputs:
  ...
  TargetGroupArn:
    Value: !Ref ELBTargetGroup
    Export:
      Name: ELBTargetGroupArn
Now we can reference the ELBTargetGroupArn in our asg-getting-started stack from the previous article using the ImportValue Cloudformation function.
AutoScalingGroup:
  Type: AWS::AutoScaling::AutoScalingGroup
  Properties:
    TargetGroupARNs:
      - !ImportValue ELBTargetGroupArn
Recreate the asg-getting-started stack and you have a finished set up of auto scaling EC2 instances running behind an application load balancer.